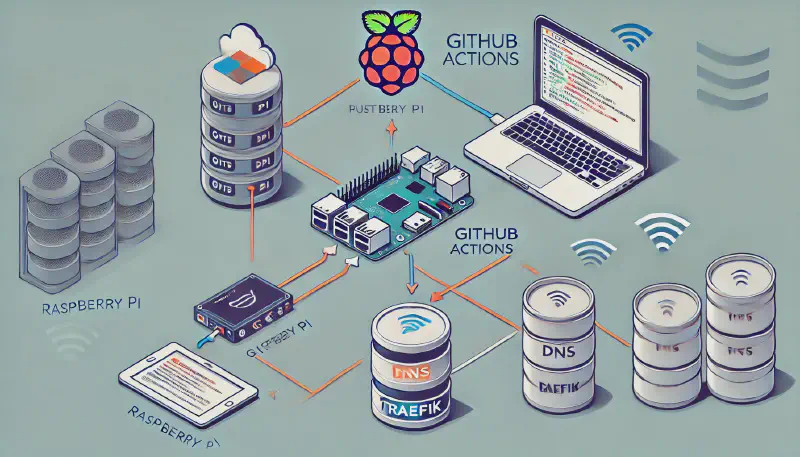
This article provides a comprehensive guide for creating and deploying a website on a local instance. Using GitHub Actions, you’ll learn how to automatically deploy new versions whenever resources are added. I’ll also explain how to set up Traefik, a reverse proxy that—along with DNS and router configuration—will make your website accessible to the public.
❯ Prerequisites
There are some prerequisites that won’t be detailed in this article: First, you need a local network with a server instance up and running, and access to this instance (either directly or via SSH). In my case, this is a simple Raspberry Pi. You should also own a domain name and have access to the DNS to redirect incoming traffic to your router, as well as access to your router’s configuration to add redirection routes. Your internet provider must have assigned you a static IP address (if not, look into dynamic DNS services). You need an existing GitHub account that’s set up for cloning, committing, and pushing to your repositories on both development and production environments. Finally, you need Docker fully set up and running on both your main computer and your server.
❯ Create and push your website
I’ll cover this part briefly since I’ve already written a detailed article on this topic, accessible here. For this article, I chose the example of a cooking blog using the cuisine-book theme by Kien Nguyen-Tuan, which perfectly matches my needs. I created a (private) GitHub repository (named “cooking”) and cloned it in my development instance.

Then, I created a new Hugo website, added this theme, and ran it locally:
| |
Note: I tested this on macOS and Ubuntu via WSL2, and it worked like a charm! However, you may encounter the following error:
| |
This is due to a breaking change introduced on the most recent versions of Hugo. Depending on how up-to-date your
template is—and any others you might use instead—you’ll need to edit the theme to fix it. If this happens, open the
file ./themes/cuisine-book/layouts/partials/head.html and replace css.Sass with resources.ToCSS to
resolve the issue. To verify that your website is running properly, visit the URL shown after executing the last
command, typically http://localhost:1313.

You can now commit and publish your changes to your GitHub repository.
❯ Dockerize this app
First, let’s create a file named Dockerfile at the root of the project. Here’s the content:
| |
Let’s explore briefly what this Dockerfile is doing. The first five lines concern the generation of the website. We use
hugomods/hugo, a Docker image created by the community for building Hugo websites (line 1). We then copy all the
necessary files to build this site into a folder named site (line 2). From this folder (line 3), we launch the
generation of the website’s static files (line 4).
The second block, containing three lines, handles serving the website through Nginx. Once served, the website will be
accessible via port 80. Starting with a Docker image that has Nginx installed and running (line 1), we copy the
previously generated files to /usr/share/nginx/html (line 2)—this is simply the directory where Nginx will expose
resources when requested. Finally, the last line specifies that port 80 of the Docker container will be exposed,
allowing external users to access the website.
Now, before committing it, let’s test this configuration by building the corresponding Docker image and launching a container with the website.
To launch the build of the docker:
docker build -t cooking:latest .
If the command was successful, create and run a docker based on this image:
docker run -d --name cooking-container -p 81:80 cooking:latest
Now, open your web browser to test that your website is accessible at http://localhost:81.
Here I have bound port 81 of the host to port 80 of the Docker container. This anticipates the final configuration
where
we will have Traefik listening on ports 80 and 443, with this website running on the same instance. If you plan to
have
the website and Traefik running on separate instances, you can use the binding 80:80 instead. In this case, you won’t
need to specify the port in the website address, since 80 is the default port for HTTP connections.
At this step, we have a website working in a Docker container. Now, let’s look at how to configure GitHub Actions to deploy it automatically when we add content to this website.
❯ Automatize build and deployment using GitHub actions (using a self-hosted action runner)
This section shows how to use GitHub Actions to automatically deploy website updates to a server on your local network—specifically, a Raspberry Pi in this example. The process involves three main steps: setting up a self-hosted runner on both GitHub and your target server, configuring your repository to trigger builds and deployments when changes merge to the main branch, and verifying the setup by testing with a new webpage.
❯ Add the self-hosted runner
Back on the homepage of your repository on github.com, go on Settings. Under the Actions > Runners category on the left-side menu, click on the New self-hosted runner green button.

This opens a page containing instructions to set up the self-hosted runner on the instance that will expose the website—in my case, the Raspberry Pi. Select the runner image and architecture that match your server (typically Linux and ARM64 for recent versions of Raspberry Pi running on a Linux-based distribution), and copy-paste the instructions into your server’s terminal.

When executing the config.sh script, it will require some interaction to choose the runner name, tags to add, etc.
Simply press enter at each prompt to use the default values. Apart from this step, the instructions are straightforward,
and you should have a runner set up and running just by copying these lines!
Back on your GitHub project, under Settings > Actions > Runners, you should now see a line with the action runner you have just configured, with the status Idle.

Note. By default, this action runner does not start automatically when the machine boots up. I have also experienced
occasional random stops of this runner. To resolve these issues, a common solution is to use systemd, which will
automatically start the runner when the machine boots and keep it running. For more details about this solution, I
recommend checking out this article.
❯ Configure GitHub action instructions on the project
Once this runner is configured, we need to define the workflow it will execute and when it will be triggered. In the workflow below, when a commit is pushed to master, the Dockerfile described above runs and creates a Docker image. Then, it creates a container based on this image and deploys it on the same instance as the runner. This workflow is located in the cooking repository as follows:
| |
Copy the following instructions in deploy.yml:
| |
Let’s examine what the “jobs” section does. First, Checkout Repository retrieves all files from the repository to the
local environment. Note the with: submodules ..., which is essential for checking out the theme files stored in a git
submodule. The remaining three steps are straightforward: building the docker image, stopping the previous website
container, and creating and running the docker with the new version.
❯ Test if the configuration works properly
At this step, everything should be set up. To test it, commit the deployment YAML file and push this commit to the master branch (or main, depending on the name of your principal branch).
In your GitHub repository, click on Actions. You should see a running workflow that corresponds to the configuration you just pushed. Click on it to view the different steps.

Wait a moment until it succeeds, then open the URL corresponding to the IP address of your instance. In my case, the IP
address of my Raspberry Pi is 192.168.1.7. When I opened http://192.168.1.7:81, it displayed
my website.
❯ DNS and routing stuff
❯ DNS
Now, let’s configure your DNS settings. First, identify your router’s public IP address. You can find this using various websites—for example: nordvpn.com/fr/what-is-my-ip. Then, add the following DNS entry:
- name. the subdomain you want to use (without your domain name). For example, if your domain is
yourdomain.com, and you want your site to be accessible
at cooking.yourdomain.com, enter
cooking; - record type.
A; - value. your router’s public IP address;
- TTL.
14400(default value, determines how long it takes for record updates to take effect).
I recommend checking out the Cloudflare’s documentation concerning DNS A records.
At this step, visiting the website’s address should show a different error message—changing from ERR_NAME_NOT_RESOLVED
to ERR_CONNECTION_REFUSED. The first message means the DNS doesn’t recognize the website’s address. The second message
indicates progress: the DNS now knows the address, but the server it points to isn’t accepting connections. The steps
below will establish the connection between your router and the instance running the website.


❯ Router
We have two things to configure at the router level: creating a static IP address for the server and routing incoming
traffic from ports 80 and 443 to this static IP address. Routers typically provide access to configuration settings
through a web interface, usually accessible at http://192.168.1.254 (or
alternatively http://192.168.1.1).
Create a static IP address on your local network. Static IP configuration is typically found in the DHCP or static IP settings section. You’ll need to create an entry with the MAC address and your desired IP address.
Route incoming traffic. For the second configuration, look for settings related to port forwarding. Create a
redirection with these specifications: TCP protocol, source port 80, destination port 80, origin any, and
destination
set to the static IP address you just assigned to your server. Create a second identical entry for port 443.
❯ Setup and configure Traefik
Traefik is a reverse proxy developed by Traefiklabs that allows you to expose resources running on your private network to the outside world. In other words, it enables people to access your website from outside your network by requesting your IP address (or a domain name configured to point to your IP address). While this definition is simplified, Traefik offers many more capabilities that are well documented in their comprehensive guide, available here. What makes Traefik particularly appealing is that it’s open source and available on GitHub, can be self-hosted, and runs on Docker. It’s also one of the most popular application proxies and comes with native support for Kubernetes clusters.
Let me show you how to install and run it. In this example, Traefik will run on the same instance as the website we
deployed in the previous step. First, create a file named docker-compose.yaml that contains the following:
| |
For those familiar with Docker Compose, this configuration file is straightforward. It launches a container using the
Traefik image, maps ports 80 and 443 from the container to the instance, and provides the container with access to
host
resources through the volumes section. Let’s create and configure each volume element step by step.
❯ traefik.yaml
This is Traefik’s main configuration file. Here’s a minimal example of its content that meets our needs:
| |
Here are the different sections and their purposes:
- Section
entrypoints(doc) defines endpoints that Traefik will listen on. We typically need two ports:80for HTTP connections (used for domain certificate requests) and443for serving the website via HTTPS. - Section
log(doc) configures how Traefik will log information. This is useful for monitoring incoming network connections and debugging your initial website infrastructure setup. Theloglevelsetting determines the amount of detail in logs—I useTRACEfor maximum detail during setup, but recommend switching to a less verbose level likeINFOorERROR, that is the default value, once everything is running smoothly. Settingformattojsonstructures the logs in JSON format, instead of the default text format. - Section
providers(doc) defines the infrastructure components and their configuration locations. We’ll use files here, though Docker is also a good option. I prefer centralizing configuration in one file rather than spreading it across different Docker compose files. Thedirectoryfield specifies where these configurations are stored. - Section
certificatesResolvers(doc) handles certificate generation for HTTPS website access. We use here Let’s Encrypt, a free and widely-used certificate authority. You’ll need to provide a valid email address that you can access. After requesting certificates, they’re stored in the location specified by thestoragefield.
❯ traefik.log
In the main configuration file of Traefik, under the log section, we have set /var/log/traefik.log as the output file
for logging. Make sure this file exists by running the following command:
| |
❯ acme.json
In the same folder as the docker-compose.yaml file, create an empty file named acme.json. You’ll need to restrict access
rights to this file. This is not just a best practice—it’s required by Traefik. Change the file’s user and group
ownership to match the Docker user, and set permissions to allow only read and write access for its owner.
If you want to run Docker with your user:
| |
If you plan to run it with the user root:
| |
❯ cooking.yaml
Now, let’s create the website-specific configuration. Typically, incoming requests to Traefik for the URL
cooking.yourdomain.com will be redirected to the IP address and port where your website is running. To set this up,
first create a folder named conf in the directory containing your docker-compose.yaml file, then create a file named
cooking.yaml inside it:
| |
Then, add the following configuration on cooking.yaml:
| |
Adjust the rule and the URL to match your own domain and configuration.
❯ Wrap up
If you follow all instructions carefully, running the command ls in the folder containing the docker-compose file
should return the following result:
| |
Now, run docker compose up -d to start the container. You should now be able to view your website by visiting the
website address you have set up in your DNS!