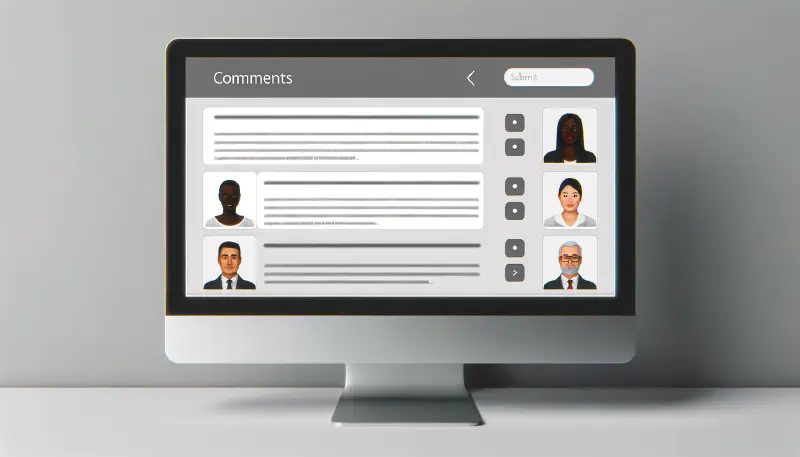
When you embark on the exciting journey of creating a blog, you’ll quickly consider how to interact with your audience by adding comments to your articles. This blog post addresses that very topic: I’ll explain how to integrate remark42 as a comment system for your Hugo blog, using the Hugo Theme Stack theme as an example. We’ll cover self-hosting it on a Raspberry Pi instance using Nginx as the web server.
❯ Why choosing remark42?
Several choices: In the very first moments of my blog, I choose discus as a comment solution. Terribly easy to create an account and setup, I performed the entire configuration, from the creation of the account on discus to the comment system effectively available in live on my blog in less than 1 hour.
A few weeks after, during the writing on my blog post concerning the setup of content security policy headers, I noticed that discus was … let’s say not really serious with the user’s data. Since this is a topic on which I pay a particular attention to, I started to have a look on the alternatives, and in particular those that already have a support on the theme I am using for my blog, hugo-theme-stack. On the other constraints I also added on the choice of my favorite comment solution: choose an open source solution, be able to host the solution by myself, for a better control of the data of my blog and its users, and finally a solution that is still maintained, with regular updates.
I finally land on remark42 that checked all my needs. Cf their official website, remark42 pay a particular attention to private or semi private information, there is no tracking or 3rd party analytic service involved. All sensitive data are hashed and encrypted. And there are plenty of social login available, including Google, Twitter, Facebook, Microsoft, GitHub, … but also via email, and the possibility to allow visitors to left comments anonymously. And a last element: “Fully dockerized and can be deployed in a single command”. So to keep it short, an ideal solution that fits quite well my needs!
❯ Launch the service on server-side, via docker compose
I choose to host remark42 on a Raspberry Pi instance, via Docker, and in using Nginx as a reverse proxy. I also generated an SSL certificate in using LetsEncrypt.
From the installation page of remark42.
retrieve the docker-compose.yml provided. Since I already have a docker-compose running on my raspberry instance, containing in particular the configuration relative to nginx (but also concerning Matomo, and its dependencies, but this is another story…), I have merged it with my other docker-compose file. I obtained a final docker-compose file that look like this:
| |
I will now detail the configuration of remark42, in particular the utility of each value (on the format ${value}), and how to set them.
❯ Docker configuration for remark42
For
${remark-url}: the domain name leading to your installation of remark42. A good way to go is to define a subdomain “remark42”, and add a DNS entry to route the traffic on this address to your instance on which remark42 is installed. Without surprises, this has to be publicly accessible, since this address will be contacted by the website on which you want to add remark42 as the comment solution. This is also used in case where you want to configure external provider’s connection method (like Google and GitHub).For
${website-url}: this is the name of your website on want to display the comments. On my configuration, since this is to display comments on my blog, this is equals tohttps://www.blog.laromierre.com.For
${site}: this is an identifier for the name of your website. If you plan to serve only 1 website, then you can set it to any value. Likedefault.For
${secret}: this is used to generate JSON Web Tokens (JWT). Except if you are particularly interested in this topic (in this case, I recommend you to have a look on the remark42 documentation), the only thing you need to know is that you have to set it to a long and non-trivial chain of character, with a high entropy.
Trick. To generate a random secret in bash:
| |
It generates a 30 characters long secret, containing alphanumeric and/or special characters ‘!’,’?’,’%’, and ‘=’. Feel free to update the length of this secret and the possible set of characters to match your needs. I also recommend you to test the robustness of your secret, for example using online tools like bitwarden’s password strength testing tool. You can also generate such secrets via online tools like 1password’s password generator.
${admin-shared-id}: the list of admin user IDs, separated by a ‘,’. To get the user ID to add to the list of admin users: from your website, connect you to remark42 with the account you want to promote as administrator. Once connected, click on the profile picture. It will open a panel in the left. At the very top of this panel, right under the name, there is a long chain, starting with the type of connection mean (like google, email, …), then an underscore, then a long chain of characters. Copy this full line: this is the user ID you are looking for.
Concerning the notifications to send to the administrators, for example when a new comment has been added somewhere on the website that embeds remark42. Note that we are only considering here the sending of email notifications.
For
${admin-shared-email}, the recipient of the admin notifications (since, in the docker compose file, we have put"email"as value forNOTIFY_ADMINS).For
${smtp-host}, the SMTP host address to send the notification email. Typically, depending on your email provider. For example, to send email via Gmail, this is https://smtp.gmail.com. For outlook: https://smtp-mail.outlook.com, … I recommend you to do a quick web search to find this information.For
${smtp-port}, the … SMTP port number! This is typically indicated alongside the host information. So, if you did the web search to get the SMTP host, you have also probably retrieved this information. If this is not the case, I recommend you to have a look on this Cloudflare article concerning the typical SMTP ports in use.For
${smtp-tls}, either true or false depending on if this is supported or not by your provider. This is widely enabled by default, so I recommend you to put the value to true, and consider the second choice if the sending of notification is not working. Again, I recommend you this Cloudflare reading concerning this topic.For
${smtp-username}, the identifier address, typically the email address, that you are using to connect to your email provider. If we take the example of Gmail, this is your Gmail address including"@gmail.com".For
${smtp-password}, the password, that goes with the email address you have filled on${smtp-username}. For Gmail, this is your connection password to your Gmail account.Concerning
${notify-email-from}, the email address that will be used to send notification. This will be the email address appearing as sender for the notification emails.
The categories below concerns the different connection means that you want to propose to your users. The list below is not exhaustive: for instance, despite my efforts, I didn’t succeed in enabling the connection via X (remark42 still require the use of the previous version of the Twitter API, not accessible to the new dev accounts), or via Facebook (who systematically asked for additional information concerning my company; so, not possible to create such an app without creation a company first 😁).
For
${auth-anon}: eithertrueif you want to allow the anonymous comment on your website;falseotherwise.For
${auth-google-cid}and${auth-google-csec}: only if you want to authorize the connection to the comment system via Google. I will detail how to create these credentials in a dedicated section.For
${auth-github-cid}and${auth-github-csec}: similar than the previous bullet point, but for GitHub. Again, I will detail it in its dedicated section.For
${auth-email-enable}, either true if you want to authorize email connection to your users; false otherwise. Note that if you enable this connection method, you also have to give a value for${auth-email-from}, and also complete information relative to the SMTP to use to send email. This information is used to send a token to the email given as login. The user then has to copy-paste this token to authorize the login.

- For ${auth-email-from} the email address that will be used to send emails related to the connection method by email.
After having detailed the signification of the configuration elements of the docker-compose.yml, I will detail how to configure the connection methods via Google and GitHub. Note that this is definitely optional, and you can also have a working solution with none of these methods enabled (you furthermore need at least 1 method enabled, so either the email or the anonymous).
❯ Configure connection methods
As explained above, Remark42 supports several connection methods: anonymous, that allows unauthenticated users to publish comments on your blog, that may cause some problems to control the content published; the connection by email, that remains relatively simple to configure, and provide, from my point of view, a good balance between the complexity of configuration and the ease of publishing content.
Other connection methods are also existing: for example X and Facebook. I will not detail here the configuration of these two providers because, I confess, I did not succeed in adding these connection methods despite numerous unsuccessful hours of tries and frustration. Several other ones are also existing, but I didn’t take time to configure them. Cf the Remark42 official website, Remark42 currently supports Google, Twitter, Facebook, Microsoft, GitHub, Apple, Yandex, Patreon and Telegram.
I will furthermore detail how to add the connection via a GitHub account, and the connection with a Google account. I will try to the most possible exhaustive, to let you take a wise decision on if you want to invest this time on their configuration or not.
❯ GitHub
The easiest to configure among these two connection methods. To enable connection with GitHub accounts, we have to fill the parameters ${auth-github-cid} and ${auth-github-csec}, respectively corresponding to the client ID and client secret parameters of an App to create from your GitHub account. To create such an App, start by logging in your GitHub account. Then, click on your profile picture in the top-right corner, then select “Settings”. On the left navigation, click on Developer Settings (typically the last item of this navigation), then on “OAuth Apps”. Finally, click on “New OAuth App”. Have a look on this GitHub documentation concerning the creation of an OAuth App.
You should now have a form like this:
On Application name add a suitable name to understand on which context this app is used in the future. Something like “Remark42 x your blog name”.
For Homepage URL, add the address of your website on which you want to add the comment’s solution. On my case, this is https://blog.laromierre.com.
For Application description, you can leave it blank or add details if this helps you to understand how this app is used on GitHub, or if you have to manage different remark42 installations for different websites, for example.
Finally, for Authorization callback URL, add the same value as the one you have added for ${remark-url}, suffixed by /auth/github/callback. For example, on my case, I ${remark-url} is equals to https://remark42.laromierre.com. I have then filled this field with the value https://remark42.laromierre.com/auth/github/callback.
Leave “Enable Device Flow” unchecked, and finalize the creation of the OAuth Application by clicking on “Register application”. Your app should now appear in the list of OAuth Apps created for your account. Click on its name, and replace ${auth-github-cid} by the ClientID value. Then, click on “Generate a new client secret”, and replace ${auth-github-csec} by the client secret that has been generated. Make sure that you are copying this value at this step, since you will no longer have access to this value from this page in the future.
❯ Google auth
I share with you a disclaimer concerning this part: this will request you a consequent time if you want to configure the connection with Google properly. More than the creation of the App on Google Cloud Platform, you will also have to validate a list of prerequisites, like adding terms of use in your website. I also believe that this is an excellent opportunity to increase the seriousness of your blog, and ensure that it complies with the different elements that any website has the necessity to have. If you have chosen Remark42 over other providers for the respect of your users and their data, having these elements in place in your website are in the continuity of this philosophy.
You first need a Google account. Once connected to your account, go on the Google Cloud Console. Click on “Select a project”, then on “New Project”.

Give a name for your project, like “Remark42” and click on “CREATE”. There is no need to update the Location field.
Once the project successfully created, re-click on “Select a project”, similarly to at the project creation step, and select the project newly created.
Then click on the hamburger menu, the icon with 3 horizontal lines in the top-left corner of the screen, then select “APIs & Services”, then “Enabled APIs & services”.

We then also need 2 things: create and OAuth consent screen, then create credentials to add to the configuration of remark42. Finally, obtain the validation of the content screen by Google.
To create the content screen, click on “OAuth content screen” on the left-side menu. Then, select “External” and click on CREATE.

On the new screen created, you have to complete some information:
App name: this is the name that will be displayed to your users who want to connect to your blog for posting comments. As a result, I recommend you to choose a name that reflects your website / remark42.
User support email: simply select your email address.
App logo: add a logo that matches the constraints given. Typically, the website’s logo is a decent choice.
Application home page:
Application privacy policy link:
Application terms of services link: good news, this is not necessary, you can leave this section blank.
Under “Authorized domains”, click on “+ ADD DOMAIN”, and add your website’ domain. For my blog for instance, I have added “laromierre.com”.
Under “Developer contact information”, add the same email address than those added previously for the “User support email”.
Validate this screen by clicking on “SAVE AND CONTINUE” at the bottom of the screen.
The second screen concerns the Scopes. There is no need to gather information from user that will connect to the website, so you can click on “SAVE AND CONTINUE”.
The third screen allows you to configure (up to 100) test users. Typically, add the Gmail address that you will use for testing that this connection mean is working properly (like, the account from which you are currently connected to).
Click a last time on “SAVE AND CONTINUE” to access to a summary of the information you have entered throughout the different steps. Click on “BACK TO DASHBOARD”.
To create the credentials, click on “Credentials” on the left-side menu, then “+ Create Credentials”, and finally on “OAuth client ID”

On “Application type”, select “Web application”. Then enter a suitable name for your OAuth 2.0 client (this is not displayed to your user). Under “Authorized JavaScript origins” click on “+ ADD URI”, and add the name of your website (on my case, https://blog.laromierre.com).
Under “Authorized redirect URIs”, also click on “+ ADD URI”, and add the address of your website, suffixed with /auth/google/callback (on my case, https://blog.laromierre.com/auth/google/callback). Save your configuration by clicking on “CREATE”.
Once done, click on the Credentials you have just created that are under the “OAuth 2.0 Client IDs” section. At the right of the screen, a Client ID and a Client secret are displayed. Replace respectively ${auth-google-cid} and ${auth-google-csec} by these values.
You have now finished the configuration (congratulations)! But, we have a last step to take, that is perhaps the most complicated: publish your app, and get your app validated by google.
Come back on the OAuth consent screen section, and click on “PUBLISH APP”. Then click on CONFIRM.

At this step, that can take several weeks, you will be reviewed by google that will regularly demand you to answer to some question, and/or to demand you to apply some changes on your website. On my personal experience, for example, I had to confirm that my app is not for Personal/Internal use, or for Development/Testing/Staging use only, and this is not for a Gmail SMTP Plugin used on a WordPress website. Then, that the site is publicly accessible, has a good level of accessibility, include a privacy policy, … after having applied changes according to these requests, including in particular the add of a privacy policy page, my app was finally granted by google, ending the configuration of this connection method.
I have no particular advice to give you concerning the construction of a privacy policy page. Furthermore, note that, your running instance of remark42 also contains an HTML page containing the Remark42 privacy policy. To access to this page, visit: ${remark-url}/web/privacy.html.

Furthermore, not that you can not simply add a link in your website to this privacy policy page (I have tested this for you!), but you have to host your privacy policies on the same domain that your website.
❯ And for the other connection methods?
I personally did not try to configure the other connection methods (or I failed, in particular with Facebook or with X). Furthermore, if you are interested in configure another method supported by remark42, or if you did not succeed in configuring either GitHub or Google in following my guidance, I recommend you to read the documentation page on the Remark42 website that relies on the topic of Authorization.
❯ Configure remark42 on the website
Now that you have Remark42 properly configured, running and publicly accessible, this is time to integrate it on your website! Personally, I have integrated it on my Hugo blog, that used the theme hugo-theme-stack. If you are on a similar case, the configuration is fairly simple: edit the section [comments.remark42] configuration file “params.toml” as follows:
| |
with ${remark-url} and ${site} equals to the value set in the docker-compose.yml file as detailed above, and ${locale} equals to the locale used on the website (in my case, the ${locale} = "en").
![The [comments.remark42] section on params.toml](params.toml-config-on-hugo.jpg)
Apply the changes, deploy, and if everything goes well, you should now have an amazing working solution to allow your users to publish comments on your website!
If you are in a slightly different situation, the official website provides a detailed documentation page detailing how to embed Remark42 on your website.
❯ Advices during this configuration
Depending on your experience on such configuration, it can take a moment before obtaining something working properly on your blog. I recommend you to start with a minimum configuration, and once you have obtained something that works as expected, iteratively add new functionalities. For examples, initially target anonymous comments to avoid the complexity around sending emails, configuration of the different third providers, admin connection, … Then, add the feature that interest you one by one. Do not try to have the most complete and powerful installation, but the one that really matches your need, and the profile of your users. In the majority of the cases, a simple authentication by email should be enough.