In this article, I will present the “Progressive Web App” (PWA) concept and its advantages over a classic web application. I will then detail how I have transformed my Hugo blog into a PWA, with the specificities of each platform, to allow you to do the same transformation on your website.
❯ What is a PWA?
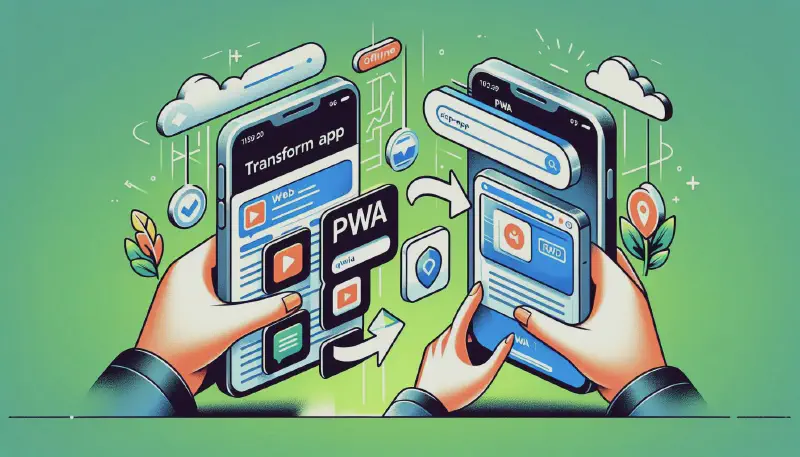
Let’s begin by asking what a PWA is. This is a type of application built using web platform technologies (typically HTML, CSS, and JavaScript) that proposes an experience for users similar to or close to **the platform-specific app ** (let’s say, like a classical app installed from an app store like the Google Play Store on Android devices or the App Store on iOS devices).
Progressive Web Apps have some key features that are:
- Cross-platform compatibility. With a unique codebase, Progressive Web Apps, like websites, can be run on multiple platforms (Linux, Android, Windows, i/mac/iPadOS, …; different devices like desktops, tablets, smartphones, …).
- Capacity to work offline. Thanks to a service worker, which is a key element of a PWA, elements of the PWA are stored in a cache, which allows the app to be used even when there is no connection available.
- Installable. Web browsers automatically detect that a website is a PWA and propose that you install it like any other application (except for iOS devices, which I will detail at the end of this article and then in a dedicated post). The user has an app-like interface with a splash screen, icons, gestures, and animations like native applications.
- Trust and safety. PWAs are served over HTTPS. I then guarantee the user a certain security level, data security, and integrity.
- Discovery. Since this is still a website, your application, and the different pages can be indexed and reached directly from a search engine.
- Automatic updates. PWAs benefit from the advantages of websites: they are automatically updated, which doesn’t require manual installation from people who installed them, contrary to native applications.
- Independence of the app stores. These PWAs are installable directly from the website.
To keep it short, to turn your application into a progressive web app, you will need three main elements:
A manifest file, that is a JSON file that defines a set of elements (like the name, the path in your website, the set of icons, …)
A service worker to add on cache or read from cache pages of the website, allowing the app to be used offline* An icon for the app. Although this is not mandatory, it is essential to consider, particularly identifying your PWA when users will install them.
A reference to the manifest and the service worker in the HTML pages served to the visitors of the website.
Your website also has to respect a few characteristics: it must be responsible (and then responsive to different kinds of devices, laptops, tablets, or smartphones) and served over HTTPS. I will detail the transformation I have applied to my website to turn it into a PWA.
❯ The webmanifest.json
Have a look at the MDN web docs if you want to have details of all the elements that you can set on the manifest. This document is typically stored at the root of the website.
Create a document named webmanifest.json, on the static folder. For the content, below is the content corresponding to
my website, that you can also use as a skeleton to define yours:
| |
❯ Focus on the elements of the manifest
❯ The icons
The icons you set on the manifest have multiple usages: first and foremost, to display the app when installed. It provides a recognizable identity to your application. It is also used to generate the splash screen of your app, is shown in the dock or the taskbar for desktop devices, on the app commutator(on macOS, for example, via the shortcut cmd+tab), to display notifications if you added it to your application…
If you take the manifest I shared earlier, you probably noticed that I define multiple icons (let’s ignore the shortcuts so far). Defining multiple icons allows the system to choose the most appropriate icon, depending on the case. Globally, the logic applied is relatively simple: given which dimension the system needs an icon, it will select the icon with the closest dimension that suits its need. If you want to test more precisely how it concretely works and which icon is used for which usage, you can create monochrome icons: a yellow square for an icon in 64x64, a red one for an icon in 128x128, a blue one for an icon maskable in 512x512… made such experiments is from my point of view the best way to understand this.
Note that online tools exist to help you create such icons. I recommend you maskable.app to understand an icon’s appearance once it has been masked. I also recommend you assets-generator from vite-pwa, that you install locally and which generates icons that you can directly add to your pwa given an image in input.
Concerning the parameter types, it indicates the format of your picture. The possible values are png, svg, and webp. The parameter purpose is to specify the icon’s purpose or in which context this icon is supposed to be used. Possible values are any (which is the default value), meaning that the icon can be used in any context; maskable, which means that the icon can be adjusted or transformed to match different icon styles like an icon with rounded corners; or monochrome: less common, monochrome icons can be used on specific context like in the toolbar, for notifications, as a status or menu icon, …
❯ Display
This parameter influences how the application is displayed once installed, from the most immersive way (full screen without any controls and without showing the system’s taskbar) to the least immersive (in the browser). Let’s have a deeper look at how the application looks with the different display values.
❯ “display”: “fullscreen”


When display = fullscreen, the application takes the page’s integrity. The controls and the system status bar are hidden. At the first launch on Android, a message informing the user that the app runs in full screen is displayed.
❯ “display”: “standalone”

When display = standalone, the system status bar is displayed.
❯ “display”: “minimal-ui”

If display = minimal-ui, some elements of the browser are displayed. These elements depend on the website considered. For example, on Chrome on Android, a header containing a read-only header is displayed.
❯ “display”: “browser”
Contrary to the three other modes, this one has a more significant impact: the app is displayed on the browser, and it is not installable. Clicking on install the app invites you to create a shortcut (like any other non-WPA website). Furthermore, you conserve the other advantages of a WPA (in particular, the caching of resources to be consulted offline).


❯ Splash screen
On Android smartphones, a splash screen is displayed at the launch of the app. This screen is built by the system from 2 elements defined on the manifest: the icon and the background color. With the manifest that I have shared before in this article and the right assets, I obtained the following splash screen at the launch of the app:
Android will choose in priority an icon with the purpose “maskable”. For the example, I have updated the icon defined here:
| |
by the following one:
And I have also updated the background color:
| |
to this color:

As a result, I obtain this new splash screen:
❯ Shortcuts
Back in the payload, there is a section named "shortcuts". In this section, you can define a list of “shortcuts” to access specific sections in your app. In my case, I have created three shortcuts: one to access the tech articles of my blog, a second one to access the articles talking about management, and a last one to access the CMS part of my website. I have specified the URL on which you will land if you click on the shortcut and a set of icons (that are displayed for this shortcut) for each shortcut. Once applied, given an installed app (with displayed = either fullscreen, standalone, or minimal-ui), you can see them in doing a force touch on your Android smartphone:
Note. Contrary to the previous records I made from the Android emulator, this capture comes from an Android device. Surprisingly, shortcut icons are not masked on Android emulators, which gives these icons a quite ugly style: the icon is contained in a white disk (cf screenshot below).

❯ Reference the manifest
Now, you have to reference the manifest in your HTML code. To do this, add in the <head> section, typically located in the file baseof.html of the Hugo theme that you are using, like this:
| |
Apply the changes on your theme (typically, if you added it via a git submodule, you commit, push changes in your theme, then update changes in your project via a git add themes/).
❯ The service worker
The service worker answers the promise of an offline app. This is typically a JavaScript file (that I name in my blog service-worker.js) that you will store at the base of your website, which will cache and serve cached files to allow this offline access.
The service worker code I will share here will store when a user reaches the site for the first time a page that is served when he tries to get an uncached page without an internet connection (offline/). Then, every time this user requests a page, the worker checks if this page has already been asked before. If yes, and the cached page is not expired (with an ETA set at two hours), then the cached page is served. Otherwise, the distant page is requested, stored in a cache, and served. Unless there is no connection, the offline page is served in this case.
You can definitely adapt this worker to better suit your needs: for instance, remove the expiration of the cache or change its duration, cache more pages at the beginning, etc.
| |
When a user fetches pages on the website, fetched resources are then automatically added to a cache of the local browser. You can check the pages that are currently in the cache with the Google Chrome Dev Tools by doing a right click on your website > Inspect. Then, on the tab Application, and the menu Cache storage, you should see a line named like the value you give to the variable CACHE_NAME (cf the screenshot below, where CACHE_NAME='fff3d992-4162-43ed-a1e6-4074cf97bdea'):

❯ Reference the service-worker
Below the declaration of your manifest as described on the previous part (typically on the baseof.html of your theme), add the following code:
| |
Note. During the development phase, I recommend you add logs to inform on the success of the registration of the worker. You can achieve this by modifying this code as follows:
| |
❯ Test your app with Lighthouse
At this step, you have all the elements that a WPA needs to have. To test that everything is working as expected or to obtain details regarding missing elements, you can use (yes, again) the Chrome Dev Tools: right-click on the website > Inspect. Then, click on the tab Lighthouse.
Make sure that the “Progressive Web App” box is checked.

Then, click on “Analyze page load”. If the analysis didn’t detect a reference to a PWA manifest on the website, it will display the scores corresponding to the other categories you have checked, and a dash "-" for the PWA section. This is, for instance, the case when we launch the analysis on youtube.com:

If a manifest is detected (like in running the analysis on my website), it will display a different logo for the PWA section:

If you click on the section, Lighthouse displays the current state of the PWA, specifying, in particular, whether the app is installable, what configurations are missing, and so on… a good backlog to build the perfect Progressive Web App!

❯ App installation on different browser / devices
In the previous sections, I essentially discussed installing a Progressive Web App on an Android smartphone. I will detail here what this looks like on different devices, browsers, and OSes since there are some more or less important differences depending on the case.
❯ On desktop devices
On desktop devices, the experience is basically the same, whatever the OS you are using. But there are a few subtle differences.
❯ On Google Chrome
This is still the first choice if you are interested in progressive web apps. Because of the DevTools we already discussed previously, and because Chrome naturally invites a user to install the PWA when available on a website (and also because Google has majorly introduced these PWAs).
When you land on a website that proposes a Progressive Web App experience, an animation is played at the right of the address bar:
Once clicked on install, the app is added to the list of installed apps on your computer. The behavior is quite similar whatever the operating system used, except concerning the shortcuts:
- On Windows, a right-click on the app icon displays the shortcuts with their icons as defined in the manifest:

- On macOS and Linux, right-clicking on the app icon displays the shortcuts but without their icons:


❯ On Edge
Edge, on Windows, has a similar behavior to Chrome. When you land on the website, Edge proposes you install the app. Once installed, a right-click on its icon displays shortcuts defined in the manifest with their associated icons.

❯ On Firefox
On Firefox, this is fairly simple: Progressive Web Apps are simply not accessible. Indeed, Mozilla Firefox developers made the choice of removing the support of the PWA since Firefox 85 (delivered in early 2021), cf this article.
As a result, if you are using Firefox, but you also want to use Progressive Web Apps, you will have to use a secondary compatible browser to install them.
❯ On Safari
On Safari on macOS, surprisingly … it works! If you click on File > Add to the dock, Safari opens a model to propose you install the app.

❯ On Arc web Browser
I add this browser to the list, since this is the main Browser I am using. And unfortunately, although it is based on chromium, it is not supporting yet the Progressive Web Apps. Unfortunately, when I am writing this article, this is not possible to install PWAs from Arc (both on Windows and macOS, the two desktop OS on which Arc is currently available).
❯ On an (Android) smartphone or tablet
I won’t go too deep into the details here on how it works on such devices for a quite simple reason: I took over this article the example of an Android device to take illustrations on how the Progressive Web App is working, so I believe I have already quite well covered the topic! Furthermore, I can add two things: there are no differences between smartphones and tablets regarding how such apps are displayed and working, and Firefox does not support such apps, whatever the platform on which it is running.
❯ The particular case of iOS
Installing and using Progressive Web Apps is possible on iOS. But, for many reasons, installing and using Progressive Web Apps on iOS devices is far from being straightforward, and it asks the developer of these apps to pay particular attention to ensure that their apps are effectively working on iOS (and also on iPadOS).
A few weeks ago, Apple even announced the end of the progressive web apps on their OS in the EU before moving back on their decision (see here and here). Now, these apps are still only partially working on these OSes. It still misses essential features like the display of a popup, similar to the one displayed on Android devices, informing the user that this website has a PWA available and inviting them to install it. I recommend you to have a look at this article, regularly updated by his author, to have a detailed list of what is available on iOS and what is not (yet?).
Since this article is already unreasonably long, I won’t detail how to adapt your PWA to make it work with decent quality on iOS devices. But this will be the topic of a future article!
❯ Wrap up
In this article, I have shared what a Progressive Web App is, its user advantages, how to turn your Hugo website into a PWA, and how to verify that your app works fine via Lighthouse. Finally, I have shared a good overview of the availability of these PWAs on the different OS and browsers, except for iOS and iPad, which will be detailed in a future article. I hope this will help you to turn your website into a PWA!
❯ References
- PWA Assets Generator by vite-pwa.org
- Web App Manifests on MDN web docs
- Preview the appearance of your icon once masked with maskable.app
- article “Firefox 85 is Here, But Mozilla is Killing PWA Features” on thurrott.com
- article “Apple confirms it’s breaking iPhone web apps in the EU on purpose” on techcrunch.com
- article “Apple reverses decision about blocking web apps on iPhones in the EU” on techcrunch.com
- article PWA tips (FR) on lalloue.fr
- article detailing the current level of support of pwa functionalities on iOS devices, on firt.dev
- article “Simple implementation of PWA on a website with a Mobile First Design approach” on dariusz.wieckiewicz.org
- discussion on the implementation of pwa on hugo, on discourse.gohugo.io